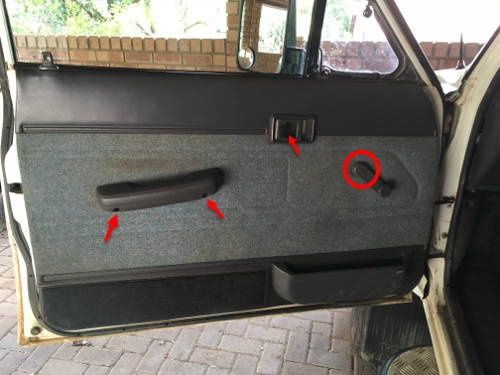
Step 1 - loosen the door panel. Take out the two screws in the door handle and remove it. Take out the screw in the door latch, and carefully pull the bracket off (pull the handle open a bit and slide the bracket through). Lever the window winder off with a flat-head screwdriver. Finally, carefully pull out the plastic clips around the edge of the panel keeping it panel in place. I found it easiest to start from the bottom.
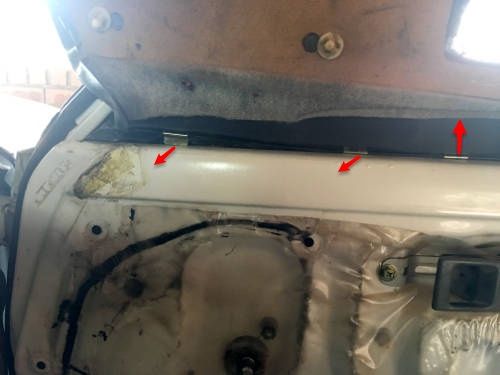
Step 2 - remove the door panel. Easiest with the window down. Lift up the panel, and you see some metal clips attaching it at the top of the door frame. The ones under the corner lever window pull straight out, while the ones further back lift up (the picture below is from the driver's side). Be careful not to tear the door fabric. Lift it off the door lock and put it aside.
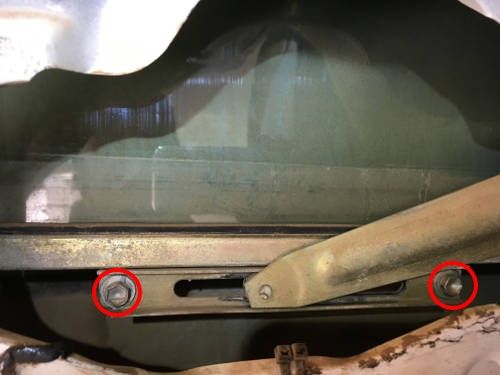
Step 3 - remove the window from the bottom bracket. Carefully pull the plastic away from the door frame, so that you can see the two channels that the window runs in. Attach the window winder (maybe remove the circlip first so it doesn't lock in place) and wind the window until you can undo the two 10mm bolts attaching the window to the lever mechanism. Be careful to support the window from the bottom when you remove the second bolt, or the window could fall off the mechanism and might get damaged. Pull the lever mechanism away from the bracket and carefully guide the window down.
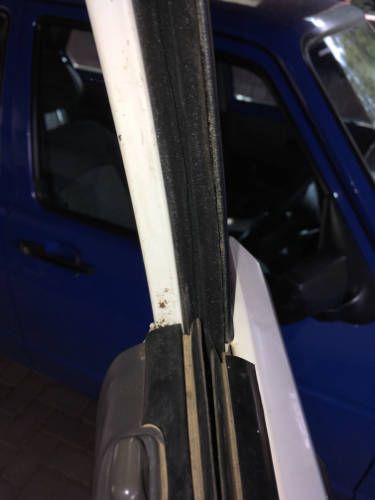
Step 4 - remove the old window seals. You will need to get the window out of the channel. I found that with the bottom bracket attached I couldn't get the window out of the door, but it worked to just manipulate the window to the far side of the two running channels. Once that's done, the old seals should pull out quite easily.
Step 5 - press in the new seals. Starting on either side, feed one end of the rubber seals through the gap at the window sill down into the door frame. Line up the end of the seal with the end of the channel and start pushing it into the channel. It might help to pinch the seal to get it to seat properly. Move up the channel, and continue all around the window until you reach the bottom of the other channel in the door frame. Use a sharp knife (box cutter works) to cut off the excess rubber at the bottom of the channel.
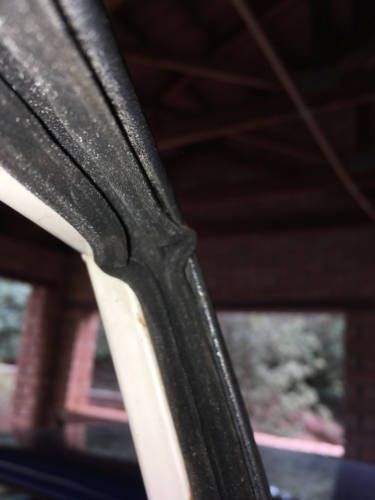
The only really tricky part is in the corner of the door. The original seals have a proper corner section, but these are just generic lengths of rubber seal, so they won't bend nicely at the corner. I guess you could cut the rubber there and press it into the two corners, but I was worried that it wouldn't seal properly so I just folded it around the corner as best I could.
Step 6 - glue the seals in place. I used a small paintbrush and tin of genchem I got from Pro Auto. First manipulate the window back into the channels (can be a bit fiddly) and attach it to the lever mechanism. Make sure that it runs smoothly up and down. With the window wound up, pull the bottom ends of the seals out of the channels and paint contact adhesive in the channel and onto the back end of the rubber. Push the seals back in place. Wind down the window and work your way around the frame, pulling out the seals, painting adhesive in the channel and onto the rubber and then pressing it back in place. When you're done, wind the window up again to put some pressure on the glued surfaces. Check that the bottom ends are still properly in place, and carefully put everything back together again. You should have a window that winds smoothly and seals properly!